
Layouts
By default, a swim lane is drawn for each node in the WBS hierarchy and stored as a default layout. Changes to the layout are not saved to the database automatically and must be saved manually by the user. The following characteristics comprise a layout and are described in more detail in this chapter and the next:
The default layout cannot be renamed, deleted, or modified. Changes to the layout must be saved as a new layout.
Swimlanes (WBS or Codes)
Swimlane collapse/expand states (see Summarizing chapter)
Timeline zoom
Timescale splits
Grid spacing
Summary activities (see Summarizing chapter)
Milestone visibility (see Summarizing chapter)
Saving, Renaming, and Deleting
Click the Layout button in the main toolbar above the timeline

Choose Save as New Layout… from the menu.
Enter a name and click the Save As button.
To rename, delete, or switch between layouts, repeat step 1 and choose from the menu accordingly.
Swimlanes
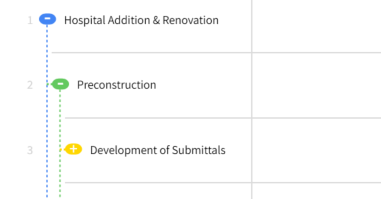
Swimlanes can be derived from the WBS or from codes. The colors are set automatically with unique colors up to 8 levels, at which point the colors repeat:
Level | Default Color |
|---|---|
0 | Blue |
1 | Green |
2 | Yellow |
3 | Purple |
4 | Red |
5 | Aqua |
6 | Pink |
7 | Orange |
P6 filters and layouts do not export. As a result, any activities assigned to a WBS node will always show above any children nodes and activities.
For NetPoint files, the top-level WBS node is named after the project title. If no project title exists, then the filename.
To change the swimlane grouping by code:
Click the Group By button above the first swimlane and choose from the menu

Codes from NetPoint with multiple assignments do not show up for grouping.
AutoGrid
Within each swim lane, activities are placed on the same grids or rows (which are numbered on the left-hand side) as other activities, according to start date and predecessor/successor chains. AutoGrid achieves a more compressed layout than a waterfall, saving vertical space, while at the same time ensuring that activities do not overlap.
AutoText
AutoText ensures that any text (e.g. names, dates, durations, etc.) does not clash with other text nearby. For example, names are bound within an activity bar unless the bar is smaller than a single word. Dates and durations will stack if they cannot fit on a single line. All of this will adjust as the row height or timeline zoom is adjusted.
To view truncated descriptions or swimlane titles, move the cursor over the text and leave it still for a second or more.
AutoLink
AutoLink chooses an optimal shape for logic relationships based on the relationship type (FS, SS, FF) and horizontal difference between a predecessor and successor. To reduce the number of links drawn on a detailed schedule, a link is only drawn if at least 1 of its activities' swimlanes is visible. In addition, if both activities are scrolled away, the link will fade. All of this will adjust as the row height or timeline zoom is adjusted.
Timeline Zoom & Split Windows

After importing, the timeline scale is set automatically to show MMM YYYY on the top and Weeks (starting on Monday) below it. The timeline can be stretched (i.e. zoomed) to increase or decrease the amount of horizontal space that the schedule occupies. Furthermore, a timescale split or window can be added to allow individual subsections of the timeline to be zoomed in or out independently. As the timeline is zoomed out, AutoText and AutoLink will adjust text and links automatically. In addition, timeline scales will adjust automatically as follows:
Top | Bottom | Trigger | |
|---|---|---|---|
Set 1 | Month/Year | Weeks | Default |
Set 2 | Year | Month | 1 day = 16 pixels (50%) |
Set 3 | Year | Quarter | 1 week = 16 pixels (50%) |
To prevent the timeline scale from switching between sets, hover the mouse over the timeline and press "T" on the keyboard
Zooming In
Move the cursor over the timeline area until it turns into a double-arrow :Pinch:
Click and drag to the right
Zooming Out
Move the cursor over the timeline area until it turns into a double-arrow :Pinch:
Click and drag to the left
Resetting Zoom
Move the cursor over the timeline area until it turns into a double-arrow :Pinch:
Double-click with the mouse
AutoFit
Right-click anywhere in the timeline
Choose Stretch to Fit
Zoom to Fit
Right-click anywhere on the canvas
Choose Zoom to Fit
Adding a Split/Window
Choose the Select Tool from the toolbar :Select:
Move the mouse until the desired date shows up above the cursor
Right-click and choose Add Timescale Split
For more splits, repeat step 3.
Use the steps above to zoom in or out on either side of a split.
Removing a Split/Window
Choose the Select Tool from the toolbar :Select:
Move the mouse over the split until the date shows up above.
Right-click and choose Remove Timescale Split
Zoom to Fit, Stretch to Fit, and Density Zoom are not allowed with timescale splits/windows.
Row/Grid Height
The spacing or height of each row or grid adjusted to increase or decrease the amount of vertical space that the schedule occupies. As the spacing is adjusted, AutoText and AutoLink will adjust text and links automatically.
Row/grid height cannot be reduced below 65 pixels.
Increasing
Move the cursor over the row/grid numbers until it turns into a double-arrow :Grow:
Click and drag down
Decreasing
Move the cursor over the row/grid numbers until it turns into a double-arrow :Grow:
Click and drag down
Resetting
Move the cursor over the row/grid numbers until it turns into a double-arrow :Grow:
Double-click with the mouse
AutoFit
Right-click anywhere over the grid number or swimlane text
Choose Collapse/Expand to Fit
Zoom to Fit
Right-click anywhere on the canvas
Choose Zoom to Fit