
Filters & Searching
Filters
Filters can be set up to hide unwanted portions of the schedule. Filters are project specific and can be applied to any layout in the project. Creating, modifying, or deleting a filter is saved automatically to the database. When modifying or deleting a filter, the changes are saved automatically to any layouts in that project which used the filter. Turning a filter on or off is also saved to the database automatically.
If a grid/row on the canvas ends up empty as a result of a filter, the row itself will be hidden. If a swimlane ends up empty as a result of the filter, the swimlane itself will be hidden.
When a filter is applied, editing dates, durations, etc. or collapsing/expanding swimlanes is disabled and the Filters icon in the Global Toolbar displays a red dot.
Creating a Simple Filter
Click the Show/Hide Details Table toggle button in the Global Toolbar so that it is in the pressed/on state.
Click the dropdown and choose Filters.
Click the Create New Filter icon.
On the right, click the dropdown next to Objects Included and choose the objects you want to remain visible (everything else will be hidden).
Click in the Field column and select accordingly.
Click in the Operation column and select accordingly. Note: the options will differ depending on the Field.
Click in the Value 1 column and set it accordingly. Note: at this point, if the filter is valid, the canvas will refresh to display what matches the filter.
If an activity on either side of a logic relationship is hidden as a result of the filter, the logic relationship will be hidden as well.
Filters can be sorted by clicking on any column name. To return to the default sort, right-click and choose Clear Sorting. Criteria rows cannot be sorted.
Columns can be resized by clicking and dragging. If text is too long, the full text is displayed on when hovering.
Building More Complex Filters
After at least 1 criteria row has been defined, click in the And/Or column. If And is selected, all of the rows must be satisfied for the objects to remain visible. If Or is selected, any of the rows can be satisfied for the objects to remain visible. Note: The two types CANNOT be mixed within a single filter.
If multiple filters have been defined, click the toggle next to Matches and choose between All or Any. If All is selected, all of the filters must be satisfied for the objects to remain visible. If Any is selected, any of the filters can be satisfied for the objects to remain visible.
Turning a Filter On or Off in a Given Layout
In the Global Toolbar, click the Layouts button and select the desired layout.
Click the Show/Hide Details Table toggle button in the Global Toolbar so that it is in the pressed/on state.
Click the dropdown and choose Filters.
In the Apply column, check or uncheck the filters as desired. Visibility will be applied automatically.
Also, recently created filters can be turned on/off by checking/unchecking the filter name in the Recent Filters list available in the Filters menu on the Global Toolbar. The Recent Filters list can display up to eight of the most recently created filters.
Renaming Filters
With the Filters view open in the Details Table, double-click in the name column in the list on the left.
Type as desired.
When finished, select another row, select another column, press the TAB or ENTER key on the keyboard, or double-click in empty white space.
Deleting Criteria Rows
With the Filters view open in the Details Table, select the desired filter from the list on the left.
Right-click on the desired row from the list on the right and choose Delete.
Deleting Filters
With the Filters view open in the Details Table, select the desired filter from the list on the left.
Click the Delete Filter icon from above the list.
In the confirmation message, click the Delete button.
The following fields are available when building filters:
Field | Operation(s) |
|---|---|
ID |
|
Description |
|
Start Date |
|
Finish Date |
|
Total Float |
|
WBS |
|
Codes |
|
Searching
To search for an object, click in the Search box on the Global Toolbar (keyboard shortcut: CTRL+F) and type as desired.

When selecting an item in the menu, the canvas will scroll automatically, and for objects, select them in blue.
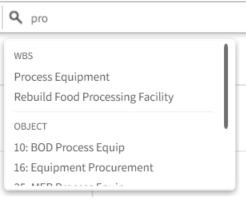
Items in grey cannot be scrolled/selected. For example, an activity or milestone that is hidden due to a filter.